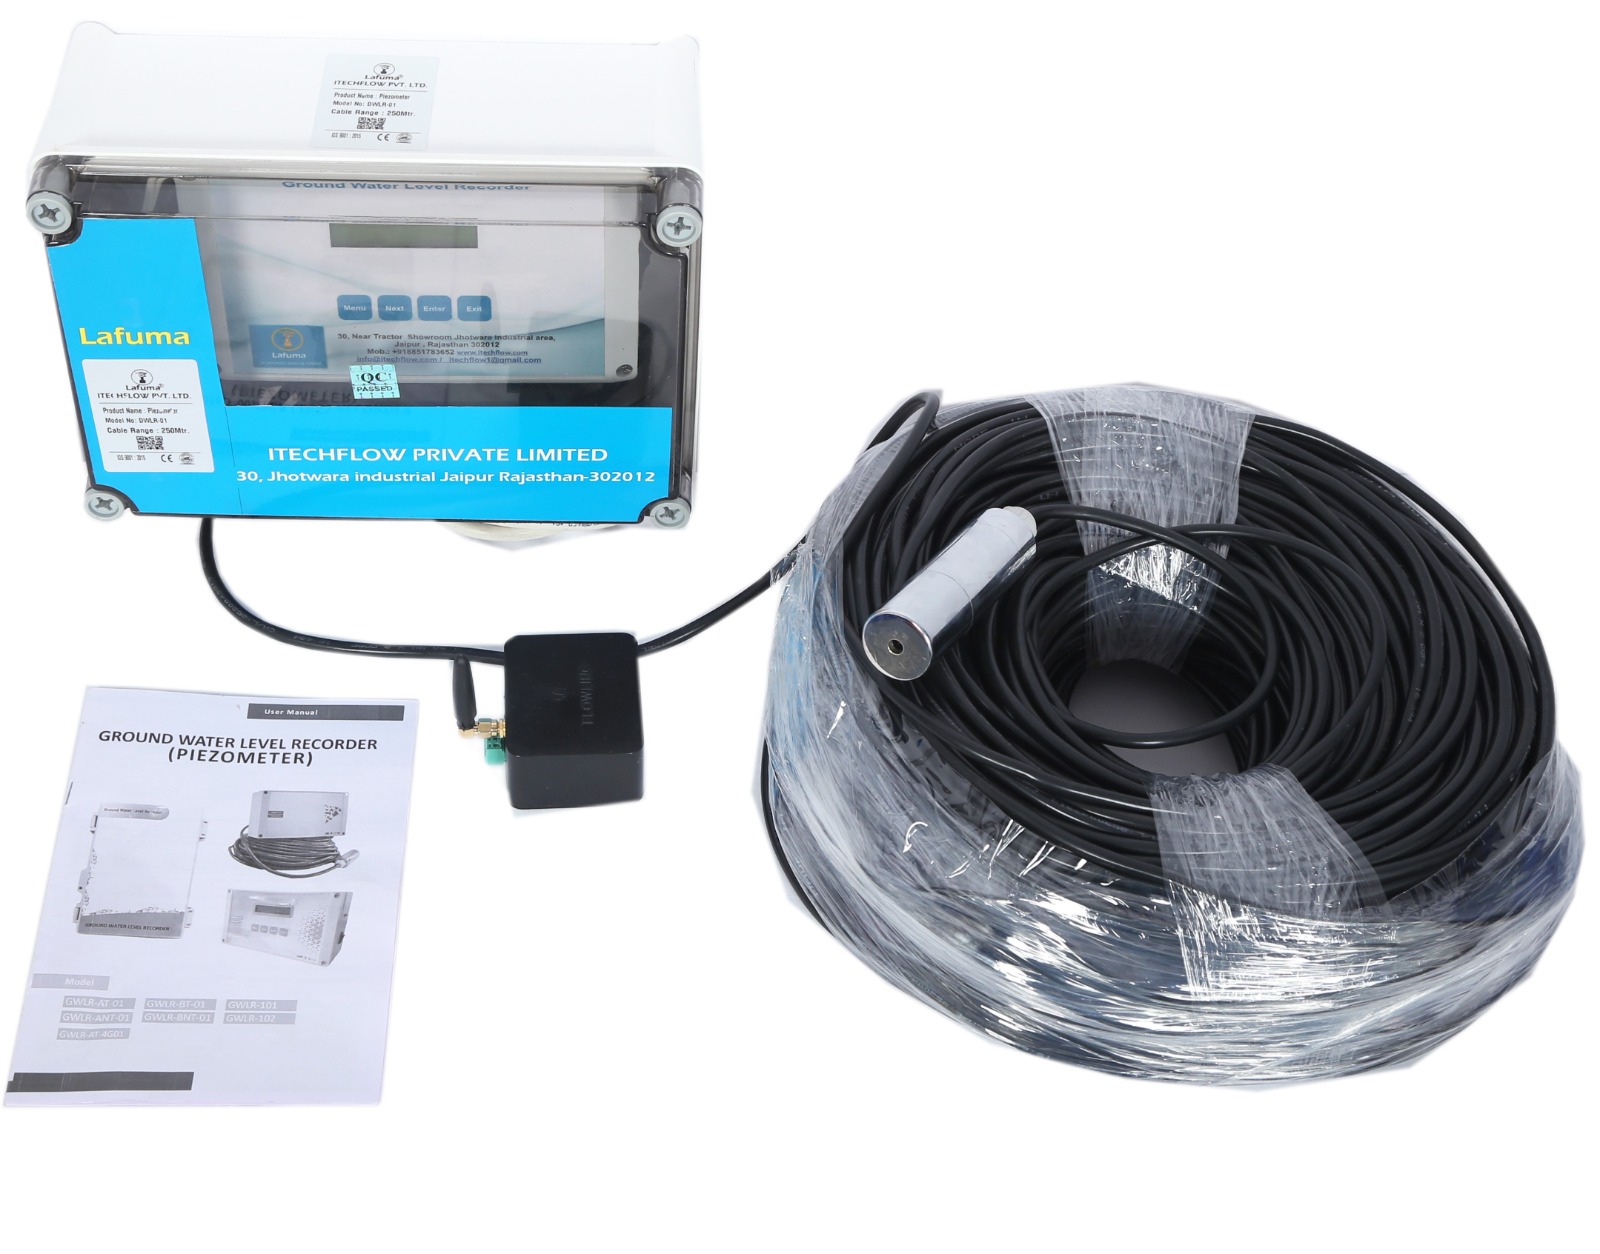
Water Level Senser
ITECHFLOW PRIVATE LIMITED
Lafuma
Ground water level recorder Piezometer Installation
1. Choose a suitable location to mount the console, se cure from unauthorized access to prevent tempering with the instrument, not too distant from the bore well and has easy reach to power socket.
2. After finalizing the mounting location, check the availability of power by connecting a 12 volts 1A DC adapter
3. Measure the length of cable to suspend into the bore well from the ground level and tie the cable firmly at the point where it leads into the bore well to avoid slipping.
4. Next, insert the port at the end of the cable into the socket provided on the instrument body.
5. Set sensor to “zero cal”.
6. At this step, feed the length of cable measured in the instrument.
7. Install the pressure transducer by lowering it into the well so that it is submerged below the water surface. Avoid dropping the transducer or permitting sharp contacts with the sides of the well casing. Do not allow the transducer to free fall into the well.
8. The transducer should be installed at a point in the well that will not go dry. Estimate the lowest expected water level, and lower the transducer to the desired depth below the water level.
9. Fasten the cable or suspension system to the well head using tie wraps or a weatherproof strain-relief system. If the vent tube is incorporated in the cable, make sure not to pinch the cable too tightly or the vent tube may be obstructed.
10. Make a permanent mark on the cable at the hanging point so that future slippage, if any, can be determined. Precautions •
Handle the Sensor head with care, it may get damaged on strong impact with hard surface or ground. •
Use 1A 12 Volts DC adapter to power the instrument, or the one which came along. •
Wind up the extra cable to prevent wear and tear.
It may hamper with the sensor’s reading.